Some of the main reasons to inactivate a user:
- When a user’s employment is terminated
- When a user resigns or retires from their employment
- When a user is on an extended LOA (maternity/paternity, mental leave, etc).
It is very important to stay on top of managing users who have left for the following reasons:
- Keeping these users active will affect your completion rates for compliance
- You do not want these individuals to continue to get emails / updates from the system if they are no longer working there
- You do not want previous employees logging in and accessing your Policies and Procedures or any other proprietary information that your Organization uploads for it’s employees
- Please note that the inactive date cannot be future dated.
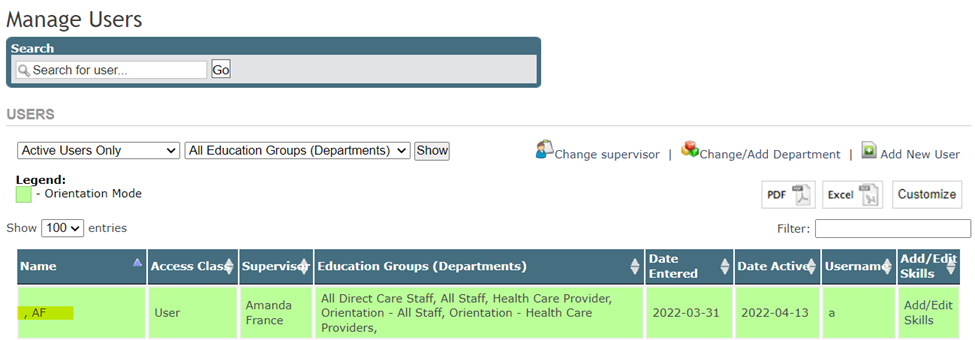
In Manage Users
Click on the name of the person you would like to inactivate.
- SIDE NOTE: you can also utilize the "Search for user" function by typing the specific user's name, then click "Go" instead of scrolling through these users.

Click MAKE USER INACTIVE


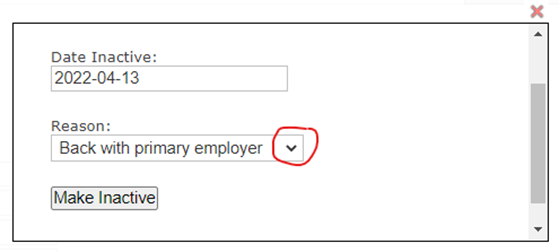
Using the drop-down menu, select the reason why you are inactivating this user.
Click MAKE INACTIVE
When users are inactivated, they go into a section in Manage Users called “Inactive Users Only”. Using the drop down box highlighted below, select INACTIVE USERS ONLY and click show, to list those individuals who have been made inactive.

If your INACTIVE USER returns…
In Manage Users, go to INACTIVE USERS ONLY and click Show

Click on the name of the user who is going to be returning

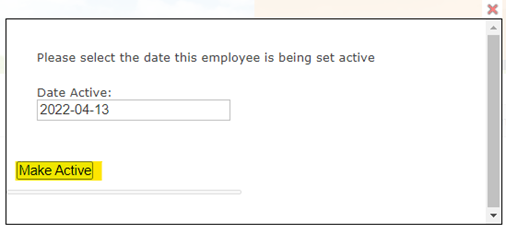
Enter Date Active then click MAKE USER ACTIVE
Click MAKE ACTIVE 
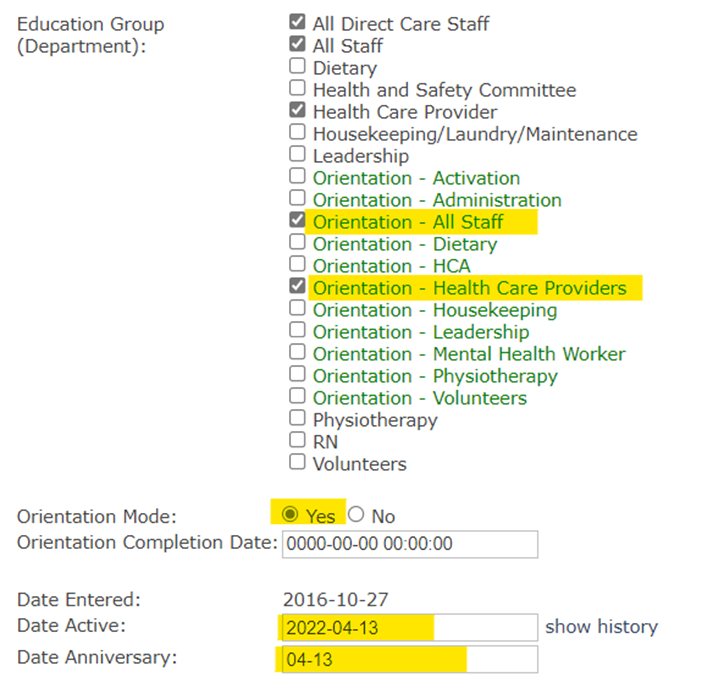
It is important to ensure you go back to that person in Manage Users > Active Users to ensure they are in the appropriate education groups.

If you would like them do a re-orientation upon their return, change Orientation Mode to YES, and check off the Orientation Groups that apply. Also ensure all other non-orientation groups are checked off as well.
If your orientation courses are assigned for _7_ days past, the due date will be 7 days from their new active/anniversary date.
Be sure to click SUBMIT to save these changes.
