Click the “Survey” Button from the home page

You should be able to locate “Manage Survey” on the right-hand side of the screen to access all the surveys.

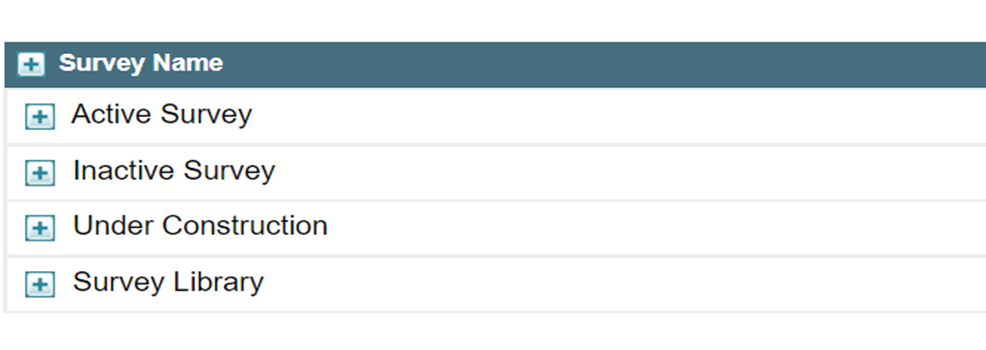
The screen should look like this as it shows what type of survey would you like to access. For instance, press the blue “plus” icon beside the Active Survey to expand all the surveys that are active.

The steps will be the same if you want to see all the surveys that are inactive, under construction etc.

Determine which survey should you wish to assign by pressing the ![]() calendar icon on the right-hand side of the course to proceed.
calendar icon on the right-hand side of the course to proceed.

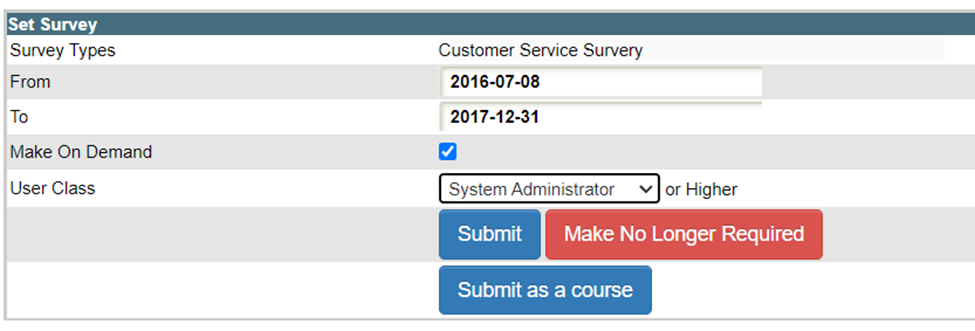
The screen should look, like this:
- Set the date range and make sure that the Make On Demand must be checked and choose the user class that will be able to take the survey (e.g. System.
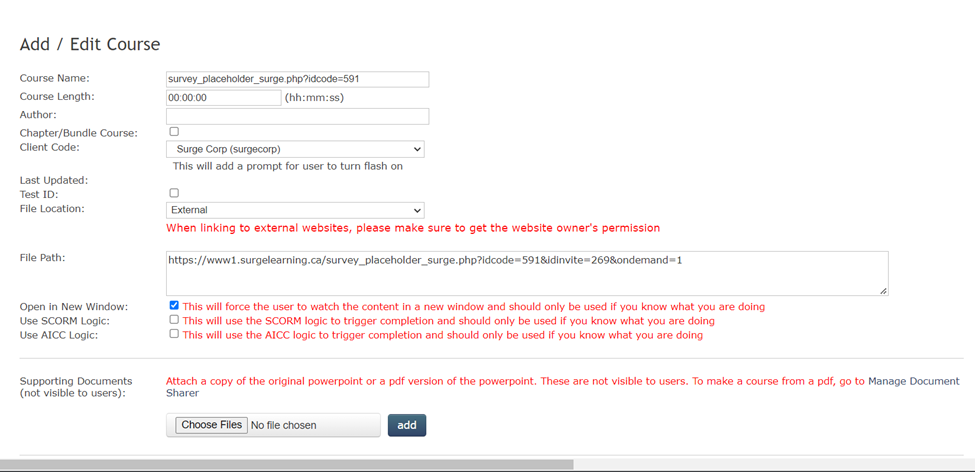
- Click "Submit as a course" and it will direct you to Add / Edit Course page. You will be able to change the name of the course.
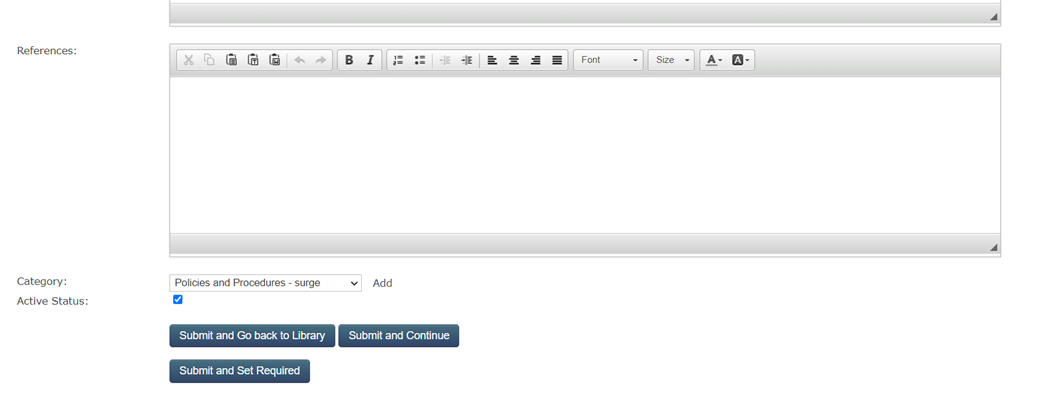
- Choose which category that you want to save this course and Click active status (it must be checked) and hit Submit.
- Go back to the Library and locate this course to ensure that it has been added successfully.


For this example, this survey has been saved to the “Policies and Professions” category. Therefore, you will be able to locate this course under this category. The course’s name is “Customer Service (Survey)."

